Saturday, April 30, 2011

New Mini Line of Hair Accessories, Bridal Accessories and Giveaways!

Hello and sorry it has been so long :(  Been really busy with creating my new mini line "Blue Cosmos on a Sunday Morning", custom bridal orders and giveaways!! 

MINI LINE - "Blue Cosmos on a Sunday Morning"
This line is fancy, fancy, fancy!   Created with tulle, pearls, earthy greens and blue cosmos!  Please see pictures and information below :)


I have not posted these on Etsy yet, but should be in the next few days.  I will be posting on Facebook later today, but if you are interested in any of these (information and price on bottom of each picture) please email me at tootyfruitymonkeyluv@yahoo.com.  :)  Very fun line - one of a kind! 


BRIDAL ACCESSORIES
Second, I am going to show you a few of my custom bridal orders over the past week - sold two beautiful pieces and have many more coming as I will be focusing on bridal accessories this week :)


Love knowing that people are wearing my bridal accessories on their big day!  Give's me goosebumps!  I would like to think I provide one of a kind bridal hair clips for an affordable price (pieces above ranged $17 to $20 before shipping).  I don't feel that people need to pay hundreds of dollars to be beautiful and classy on their big day - hey, I live on a tight budget, I know :)  If you are interested in me creating you a bridal hair clip please contact me at tootyfruitymonkeyluv@yahoo.com!

GIVEAWAYS and SALES
Check ouf my current sales and giveaways below!

  • Every 50th fan receives a free hair accessory (free shipping) - just visit my page and click "Like" :)
  • I am currently doing a referral giveaway - send me the most "fans/likes" and you win a Mother's Day brooch and a set of free alligator clips/bobby pins (free shipping) - just use that share button :)  Ends Wednesday, May 4th...
  • Use Spring10 at check-out to receive 10% off entire Etsy purchase :)
AND :)...
OH and I NEED to share my newest one of a kind headband I created - very proud of this creation (see below):


Okay, ONE more thing...

A picture of my Tooty Fruity and Monkey (I have to document all times where they are NOT beating each other up lol)


Thanks for stopping by - tell your friends!  :)  Once I have enough fans I will be doing Blog Giveaway's TOO!

Saturday, April 23, 2011

First Tutorial! How to Create Paper Flower Hair Clips Out of Scrapbook Paper!

Hello everyone!  Sorry it has taken me so long to actually create this tutorial.  I have been busy - it is awesome!  :)

First, I would like to point out a few things... 
  • TootyFruity took half the pictures, so lets just say they aren't perfect (but A for effort!)
  • My mother is going to cringe when she notices my chipped nails as she always does (2 kids, pregnant, full-time school, new business, yes - I am making excuses!!! :)
  • Lastly, I am a perfectionist when it comes to my actual product, but my work space, uhhhhhh NOT so much.  So, if you cringe at the sight of dirty work spaces - this may not be the blog for you :) 

Okay, moving on - this tutorial is going to show you how to make easy paper flowers with simple and inexpensive materials.  You can definitely put your own creativity into these (make them bigger, smaller, different colors, different embellishments, make them into tall flowers with pipe cleaner, hang from the ceiling with wire, etc.).  I personally will be creating these for my daughters vintage inspired 7th birthday and doing all of the above and including some in the gift bag :)  Can't wait to share those pics!

Okay, lets get to the point, please see pics and easy directions (shown underneath picture) below...


Materials:  Mod Podge (matte kind shown, but can use any kind), two different kind of scrapbook paper, felt (with something to create a small circle - I show a little medicine liquid dispenser), paint brush/sponge, pencil, scissors, glue gun, cardboard/towel/hard surface (you don't mind getting dirty), ribbon lined alligator clip (on not lined), embellishment

Cut one scrapbook paper 3 1/2 inches by 3 3/4 inches and the other 2 1/2 inches by 2 3/4 inches.  You can make these squares smaller or larger depending on the project.  I typically make them a tiny bit smaller for hair clips (and always end up trimming the larger flower to match better) or much bigger for stemmed paper flowers.


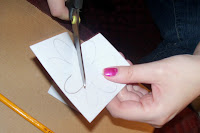
Draw a flower (almost to the edge) of each square.  Obviously, by looking at my drawings, these do not need to be perfect lol.  Also, you can create any shape you want for these (you can even find templates online for small flowers).  I did very basic and easy flower shapes.  Cut them out and now you have your two layers (if you are feeling really brave, you can create three, four or even five layers!). 


Grab your Mod Podge and paint on a medium to thick layer onto one side of each flower and let dry for 15 to 20 minutes.  Once this side is dry (very important they are dry!) flip over and paint the other side of each flower as well.  Let dry 15 - 20 minutes (I finished a few other projects while they were drying :).


Layer the flowers (don't glue yet) and crumple, fold, chew (just kidding - wanted to see if you were paying attention) the flowers to get a less perfect flat paper.  The Mod Podge will make these much more durable (you will see when they are dry)!  I am sure they could rip, so be kinda careful, but they are pretty durable.


With your glue gun put a medium sized dot on the top of the bottom layer of the flower (larger piece).  Again, I actually cut down the size of the larger flower because it was too big in comparison to the smaller piece.  Place your finger on top for 10 - 15 seconds to secure them together.  Almost done!!! 


Choose your embellishment.  I show some different options above (shimmery pink flower, button, hard floral rosette, purple faux pearl).  I end up using the shimmery pink flower and the purple faux pearl, but anything would look cute!  :)  Glue these embellishments with hot glue gun to complete flower.


Cut a small felt flower circle and glue one side.  Place glued side on the bottom of your flower for added security and to prep it for attaching to the alligator clip.


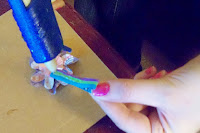
Line the top of the alligator clip (not the curved part, only the straight part of the top) with hot glue and attached to the bottom of the flower (in the middle of the felt circle).
Viola!  You have a cute and easy durable paper flower hair clip!  Perfect for casual outfits for your little TootyFruity or Monkey's or yourself!  Quick and easy way to match your outfit! 
Well, there you have it...  my first tutorial.  I am sure pictures, projects and descriptions will get much better lol :) 

Please let me know what you think!

Friday, April 15, 2011

My New Blog!!

Good evening! 

So, basically, I have had a blog for the past month through the same company that I created my website through.  Great company, but wasn't too thrilled with the creative options for the blog connected.  I have decided to move on to bigger and better things (Blogger :) ).  I love that I am able to pick a background design and choose my font/colors that reflect my personality and company!  I mean, anyone who sells handmade items for a living, or loves photography and art NEEDS creative options.  It was just a matter of time... :)

With that said, welcome!  My name is Ashley and I have recently started my own company.  The company name is tootyfruitymonkeyluv and is named after my two daughters (nicknames Tooty Fruity and Monkey).  I also have a fabulous step-son who is almost 13 (OMG - a teenager) and have another little fashionista on the way.  The new addition is expected July 2nd (which is also Monkey's birthday and two weeks after Tooty Fruity's monkey - guess we know my fertile time of the year lol)! 

Tootyfruitymonkeyluv is a company I created not only for my sanity, but also to allow me to stay home with my little ones (which I believe may be harder than going to work, I have done both).  I create adorable and classy hair accessories (flower hair clips, beaded hair clips, headbands (traditional and stretchy), alligator clips, bobby pins, fabric flower accessories), sell my photography (LOVE photography), canvas art, pictures frames and more (soon to come - adorable burp clothes)!

I love owning my own business - it really allows me to do my three favorite things - business, creativity and photography!  I really hope you enjoy and become a virtual friend for years to come!  :)

Please see my information below and a picture of my four amazing children:
ETSY:  http://tootyfruitymonkeyluv.etsy.com/
WEBSITE:  http://tootyfruitymonkeyluv.vpweb.com/ (soon to be new and improved!)
FACEBOOK:  http://facebook.com/tfmluvhair


Can't Wait!

My true inspirations!